
LOPHA Coffee Production Process: A 15-Step Journey from Farm to Cup
Discover LOPHA’s 15-step coffee production journey, from harvesting, post-harvest processing and ultrasonic treatment to roasting, packaging and final product testing.
From ripe coffee cherries on the branch to aromatic roasted coffee in the cup, quality takes shape through many connected steps. LOPHA’s 15-step journey explains how harvesting, processing, sorting, cleaning, roasting, and quality checks work together. It follows the coffee from farm to cup and shows how early decisions can affect the final product.
1. Quality starts before the beans reach the factory
When we enjoy a cup of coffee, we often talk about its aroma, body, acidity, or aftertaste. But these qualities are experienced at the end of a long journey. Before roasting, the coffee has already passed through many conditions: it ripened on the tree, was harvested, had its outer layers removed, was dried, and was transported.
Quality does not appear only when a roaster is switched on. It is built through the way the coffee is handled at every stage of the process.
An unripe coffee cherry is usually at a different stage of development from a ripe one. Bruised coffee cherries or cherries left piled up for too long may undergo unwanted changes. After processing, beans stored in damp conditions can absorb moisture again and lose quality.
Roasting at a high temperature does not necessarily undo these problems. Later steps can be done well, but they cannot correct every issue that developed earlier.
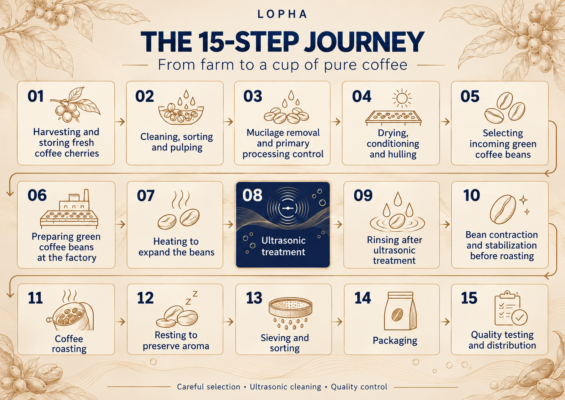
A key part of how LOPHA presents coffee production is viewing it as a connected chain of steps. The 11 stages at the factory cover the process from selecting the raw coffee to quality checks and distribution. When the growing area and early processing are included, the journey becomes 15 connected steps.
The first four steps explain where green coffee beans come from. The next 11 show how the beans are prepared, treated, and finished.
2. From ripe coffee cherries to green coffee beans
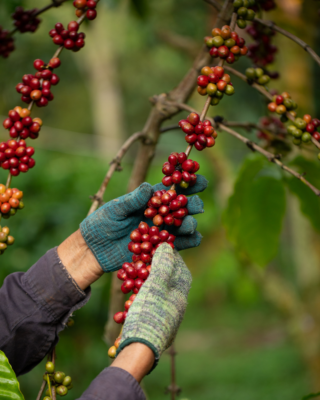
Step 1: Harvesting cherries at the right ripeness and protecting them after picking.
A batch with a fairly even level of ripeness is easier to process. Unripe, overripe, or damaged cherries can be identified and sorted according to suitable criteria instead of sending everything through the same process. After harvesting, the cherries need protection from dirt, bruising, and heat build-up caused by long storage. Moving them promptly to the processing site helps limit unwanted changes before they can be controlled.
Step 2: Cleaning, sorting, and removing the outer cherries.
Fresh cherries may contain stems, leaves, soil, or other physical debris. Cleaning them before removing the outer fruit helps keep foreign material out of the equipment, while sorting separates cherries that need different handling. In wet processing, a depulper removes the skin and fruit pulp, leaving the beans with a layer of mucilage on the outside. The equipment should suit the size of the cherries, since beans cut or cracked during depulping are difficult to restore to their original condition.
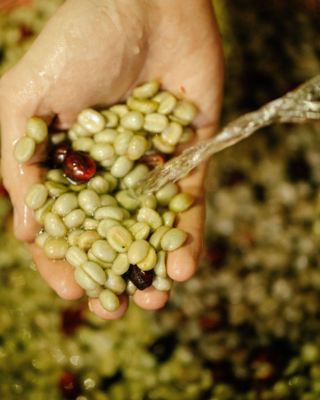
Step 3: Removing mucilage and controlling the processing stage.
The mucilage around the bean contains organic matter, sugars, and pectin. Depending on the chosen method, it can be removed through controlled fermentation or mechanical demucilaging; some processes also include washing. Not every coffee needs to be fermented in the same way. The key is to choose a suitable method and identify the right time to stop, avoiding unwanted odors or leftover mucilage that could interfere with drying.
Step 4: Drying, resting, and hulling.
After processing, the beans still contain a relatively high amount of water. Drying in the sun or with a dryer brings them to a moisture level suitable for storage, but the goal is not simply to dry the surface. If the top layer dries faster than the bottom, or the center of a bean remains damp while the surface is dry, the batch may become uneven in quality. After a resting period to stabilize, the parchment layer is removed to produce green coffee beans. These are the beans used in many commercial roasting processes.
3. Selecting and preparing coffee at the factory
Step 5: Selecting incoming green coffee.
Green coffee beans are not perfectly uniform. Batches can differ in moisture, size, defects, and storage history. Checks at receiving help identify issues that could affect production. Details such as the lot code, source, and initial assessment also support traceability if the quality needs to be reviewed later.
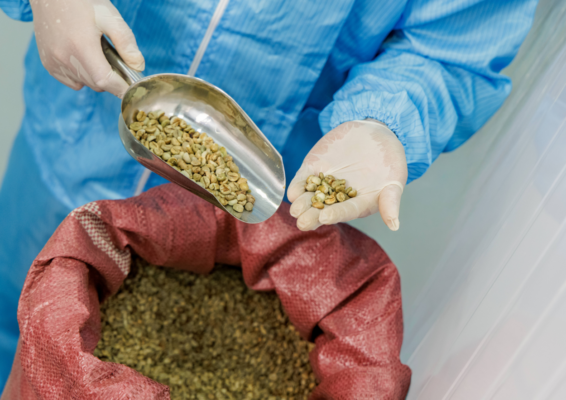
Step 6: Preparing the coffee at the factory.
During transport and storage, some dust, dry husk fragments, or other physical debris may end up with the beans. For this reason, preliminary cleaning uses suitable methods to prepare the coffee before more specialized treatment. The aim is to remove materials that can be separated mechanically. This step is different from ultrasonic treatment; the two methods do not fully replace one another.
Step 7: Controlled heating to expand the beans.
In LOPHA’s factory process, heating takes place before ultrasonic treatment, this step prepares the beans under controlled conditions; it is not the final roasting stage. Heat can change the structure of the raw coffee and how heat is distributed inside each bean. The temperature and duration therefore need to match the purpose of the process. Heating settings are adjusted for the intended treatment and should not be confused with production roasting.
4. Ultrasonic technology and the cleaning process
Step 8: Ultrasonic treatment.
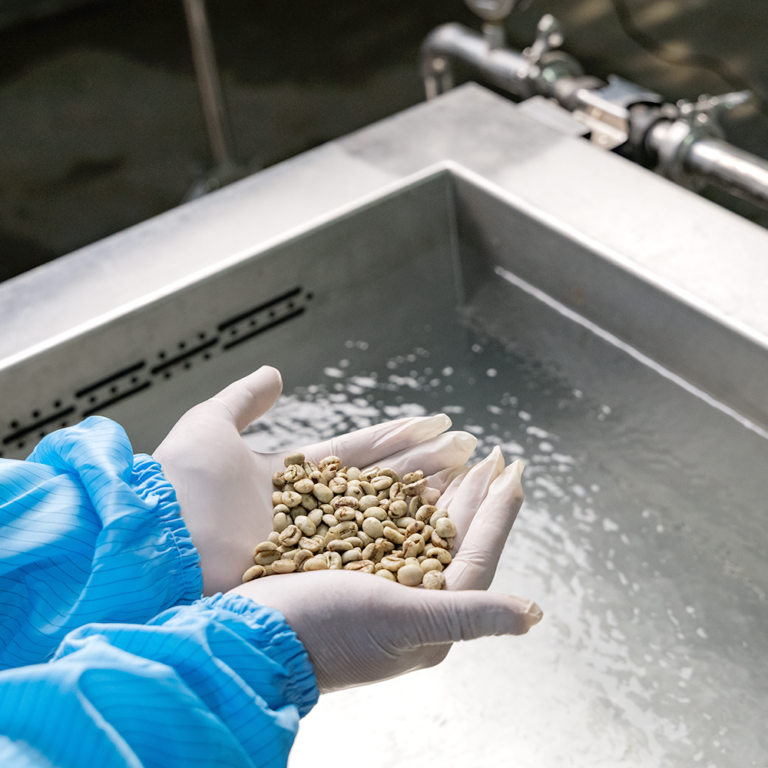
When ultrasonic waves travel through a liquid, they can create cavitation: tiny bubbles form and then collapse. These localized changes create physical effects that can help loosen or separate some substances on a surface.
LOPHA applies this principle in its ultrasonic coffee-cleaning technology, adding a specialized treatment step to the production line. The results depend on factors such as the condition of the beans, water quality, and operating conditions. The technology does not guarantee the complete removal of every hazard.
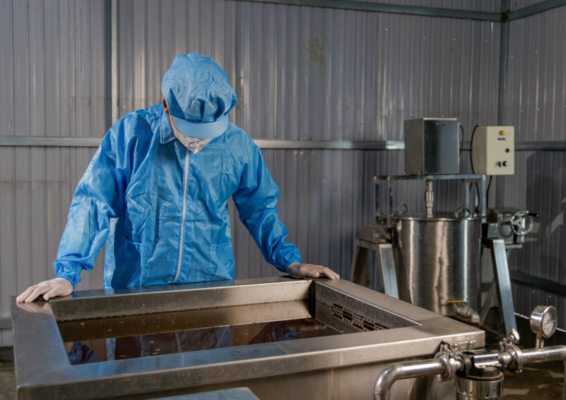
Step 9: Washing after ultrasonic treatment.
If physical action helps separate residue and debris from the beans, washing helps carry the loosened material away from the coffee. That is why ultrasonic treatment and washing are connected steps with different functions.
Water and washing equipment must be kept clean to reduce the risk of recontamination. Deep cleaning has limited value if the beans come into contact with a dirty source again in the next step.
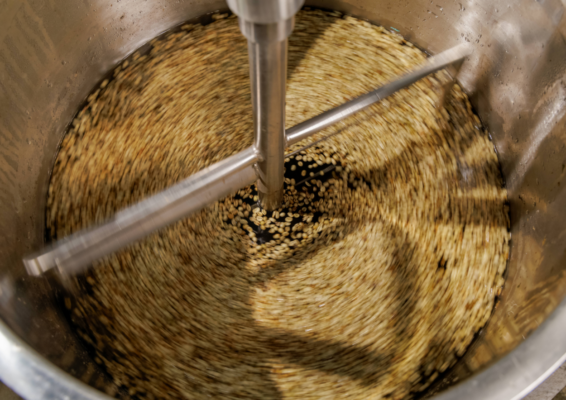
Step 10 – Stabilizing the beans before roasting.
After steps that use water, the beans need to be brought to a condition suitable for roasting. LOPHA calls this stage “closing the beans” (moisture stabilization); in simple terms, the beans are stabilized and their moisture is controlled before roasting.
If some beans contain more water than others, they may absorb and transfer heat differently during the same roast. Stabilization is therefore an active preparation step, not simply a waiting period.
5. Roasting, resting, and finishing the product
Step 11 – Roasting the coffee.
Heat-driven changes at this stage create the beans’ color and many of their characteristic aromas. The Maillard reaction, changes in carbohydrates, and the formation of aromatic compounds take place as the beans absorb heat.
The roast level and control of the roast curve help bring out the character of the raw coffee. Arabica can show delicate aromas and bright acidity, while Robusta often has more body, a more pronounced bitterness, and a longer finish. There is no single roast curve that suits every batch or every taste preference.
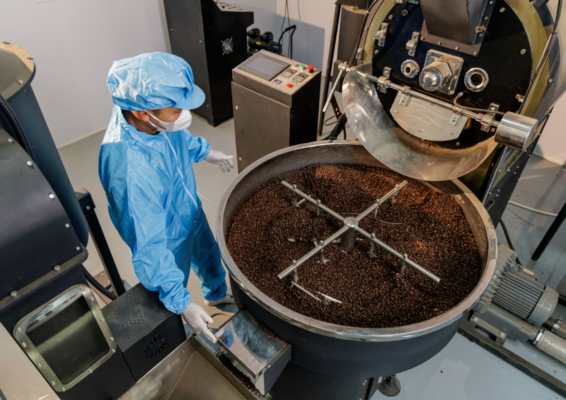
Step 12 – Degassing the roasted beans.
Freshly roasted beans are still hot and continue to release carbon dioxide (CO2) formed during roasting. Allowing them to rest for a suitable period helps the producer manage their condition before packaging or brewing.
Resting after roasting is not a second fermentation, and it should not be confused with the earlier processing stage in which mucilage is removed from the coffee beans.
Step 13 – Sorting the roasted coffee.
A roast batch may contain broken or defective beans, or foreign material that needs to be removed. Checking and sorting the finished coffee helps improve consistency before packaging. However, a final check cannot replace the initial selection of green coffee, because some problems that begin with the raw material cannot be fixed by sorting alone.
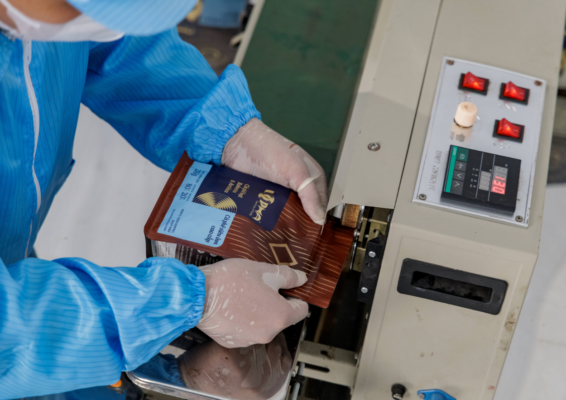
Step 14 – Packaging.
Roasted coffee can lose aroma and be affected by oxygen, moisture, light, and surrounding odors. Suitable packaging acts as a barrier to reduce these effects. The packaging material, seal quality, one-way valve when needed, and lot identification are all important.
With ground coffee, the greater surface area in contact with the environment makes storage and use after opening especially important.
6. Quality checks, traceability, and distribution
Step 15 – Quality checks and distribution.
Packaging the coffee does not mean quality management is finished. Checks before the product leaves the factory may cover the package condition, lot code, sensory evaluation, and test criteria included in the quality plan. Each type of test answers a different question.
A seal check is not the same as a microbiological test, and checking roast color cannot replace tracing the source of the raw coffee. A careful approach uses the right tool for the specific risk being monitored.
After the product leaves the factory, storage and transport conditions continue to affect its quality. Prolonged exposure to high temperatures, unsuitable humidity, or physical impact can reduce the protection offered by the packaging. Production dates, expiry dates, and lot codes help sellers, distributors, and buyers manage products more clearly.
This part of the process is easy to overlook when enjoying coffee, but it helps bring the flavor developed at the factory closer to the experience of the person drinking it.
7. Purity is the Result of Multiple Connected Process Stages
The 15-step journey shows that no single stage can represent the coffee’s overall quality. Harvesting cherries at the right ripeness provides suitable raw material. Processing and drying help protect it. At the factory, the beans are selected, cleaned, and prepared. Roasting develops flavor, while packaging and quality checks help maintain it before the coffee reaches the drinker.
Ultrasonic technology has a specific role in this chain, but it does not work in isolation from the other steps.

We can also understand the process through familiar examples: choosing ripe cherries is like choosing good ingredients for a meal; drying and controlling moisture are like storing produce before use; roasting is the cooking stage that shapes flavor; and packaging helps preserve the result until the bag is opened.
These comparisons do not replace technical knowledge, but they can help coffee drinkers see why each step matters.